Friday, November 24, 2006

Pilgrim costume finished.

In case you wanted to know...... I did finish in time!!!

I finished the pilgrim and indian costumes by 4 am on Wed. I got tired and didn't have time to put them on my blog. I got up early Thurs. morning found a small amount of black fabric and decided to whip of a dress. I didn't take pictures as I went but I can tell you how I did it.
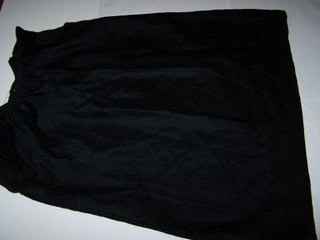
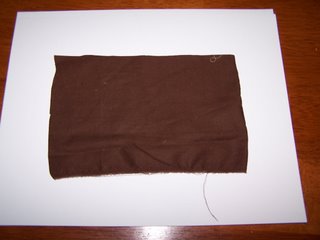
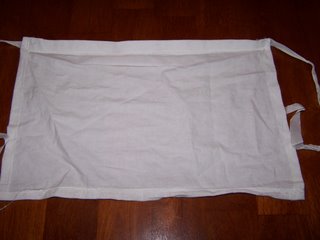
This should fit my DD for a very long time yet. I used 1 piece of black fabric 19 inches wide and about 44 inches long. I folded it in half the fold is the neck area. I cut a hole in the center of the fold 9 1/2 inches wide it dips down about 1 1/2 inches in the front and the back of the neck just went straight across. You can just cut a hole large enough for the child's head. I left 5 inches on each side for her arms and sewed up the sides. I then turned under the 10 inch (5 front and back) of the armholes and seamed along. 1 inch black FOE was added at the neck and that was it. I spent about 5 maybe 10 minutes and it was all done.
The apron was a piece of fabric about 16 inches wide and 11 inches long. Sewed around 4 sides and added ties (same thing the bonnet ties are). Very simple.


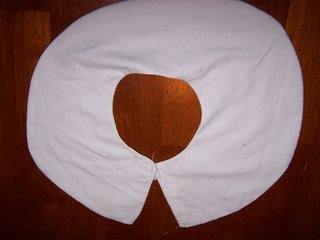
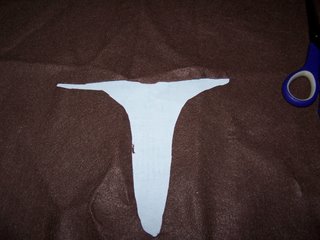
The collar isn't pretty! BUT it did work OK. This was what I was working on at around 3 am (my excuse for being ugly). cut 2 circles (mine was more like ovals) 13 inches around and another circle in the center about 5 1/2 inches. Then just a large upside down V to make the shape. I sewed around the entire thing leaving a hole to turn. Turn then sew the hole shut. I added a little velcro to hold it shut in the front. 
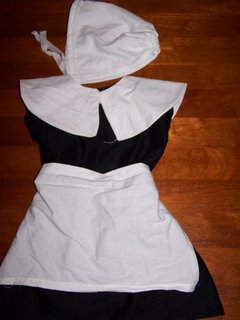
This is the full costume. It was so worth staying up to do. My DD LOVES it! I feel good knowing was able to do something for her like I did for her brother when he was her age. KWIM?
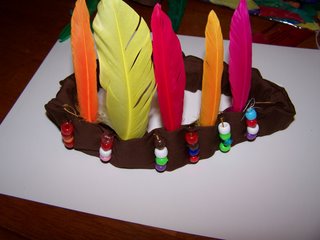
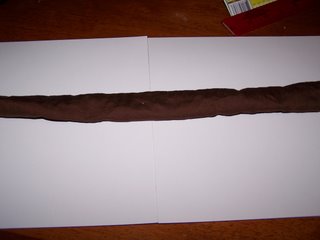
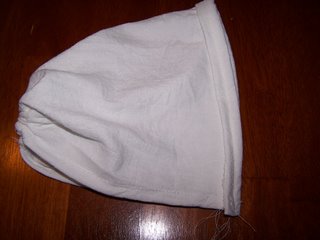
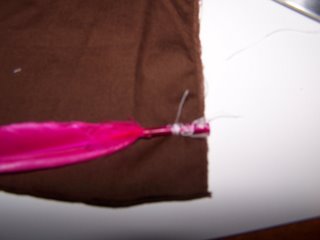
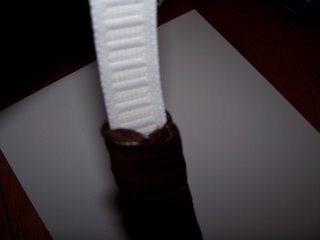
Wednesday, November 22, 2006

More Indian Costume

I think if I made a few more I would find a simple way but when I wait until the last minute I don't have time to think about what I am doing. This didn't take long just longer than I wanted.

Sew a tube of fabric. This one was 26 inches long but it didn't have to be.

Add some elastic (using head size) Sew ends together.


Take a rectangle of fabric long enough to wrap around the tube (just small area to add feathers).

Sew feathers on the end with WRONG side of FEATHERS facing up.
Snip the ends that hang over.
Fold the feathers over making a fold in the fabric
Wrap feathers around tube and stitch shut
I added beads as I was sewing the layers together.


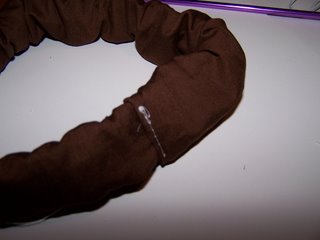
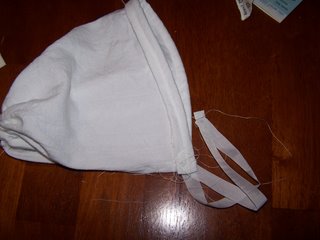
It is very late and I am in a rush so if this is hard to understand just email me at schoolnsuch@aol.com

Indian (Native American) costume

First I have to say that I am breaking one of my own rules with this one. I try not to ever mention to anyone things I make for anyone other than myself and my children. That is why I often go so long without posting my crafts. This time because I am short on time and supplies I will have to show the Indian costume that is for my Nephew. I do have on almost the same for my son but it is one I already made back when he was 2 or 3 years old. When I started this earlier in the day I wasn't planning on making more than one costume but because I found our old one that (just needed beads) I will take pictures on making one. VERY simple. This was made from a large piece of felt. Great thing with felt is it doesn't fray. This was a NO SEW just cut and bead project.
The felt piece is 18 inches wide and 4 feet long. It was the size I had so that is what I am using. The one I made up years ago is around 3 1/2 feet long and almost 2 feet across.
I folded the fabric in half and cut a large T so a child's head will fit in. I have a piece of paper under the fabric so you can see. The picture is upside down. The neck is at the bottom.
Cut away some of the T like this. Again a piece of paper is under top layer so you can see.


Cut some fringe.

using a bunch of pony beads that I already had and some denim thread and adding 5 beads on the needle at a time I went around the front.
Not perfect but DONE! My son is happy I hope my Nephew will be also. I will post my headband next.

I am going to look and see if I can find enough brown fabric to make ties for the sides. I might be able to dig up some string or something to tie the sides. If not I will add a snap to each side to help keep them in place on the boys.

Quick Pilgrim hat.


Pilgrim hat can fit from baby to adult (depending how far your roll the ends).
WARNING! This was something I came up with as I went along. It is NOT as NICE as ones you can buy a pattern for. My little girl is to young to care so it works for us.
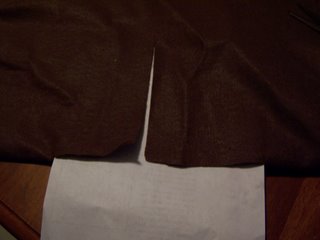
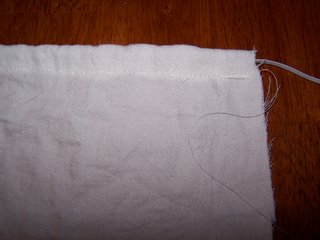
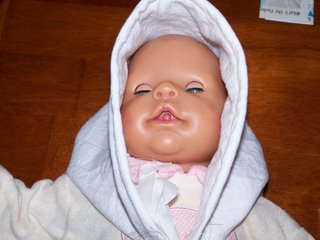
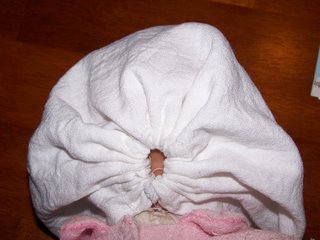
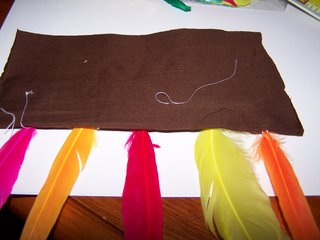
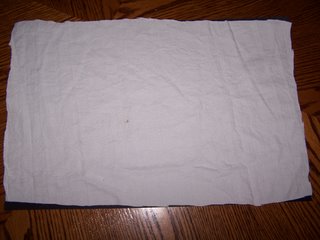
Very fast pilgrim girl bonnet..... I cut out a piece of fabric 12 X 18 inches. This was large enough for me (an adult to wear). The next hat I do will hem around the outside first this one I did it as I went along.


This is shows the elastic along the one end. Sorry about the blurry picture I am in a hurry.
When pulled tight it makes the back of the hat.

The opposite end of the hat got rolled up to make it the right fit for my 17 month old.


LOOK what I found.....


This came from my MIL (she keeps lots of stuff) this was 25 cents new. I found it in a box of stuff she sent me.


It worked great for the ties! Project took only a few minutes! COST...... $0 YEAH!
This is it on a baby doll with a tiny head (my DD's head is a LOT larger).

This is the back. I still need to snip the strings. I was making it up as I went along and I didn't want to waste time snipping if it didn't work. KWIM?
I will post my Indian costume in a few minutes. I am making costumes adding the pictures to my blog and taking care of my children all at the same time. My children get a little wild around this time of night. I hope to get this all done in the next few hours.

Training pants


When my DH was off work on vacation last week he played with the children so I could sew some. I made up 18 new training pants/diapers for my DD. I spent NO money but I did already have all this material. I am running very low on thread (I had to take the thread out of my serger to use my sewing machine. I think my projects will have to be more and more creative (thrifty) as the weeks go on. March is still a long way off. The pattern I used was from http://www.thenappynetwork.org.nz/diy.php I used the Wee Weka M-L Side Snap Nappy. I just printed out the pattern and traced it on 1 layer pul and 1 layer Alova then I used FOE to go around the outside. I let the Alova slip out of the FOE in the front to make a very quick pocket. I did not read the pattern. It might even give suggestions to alter it the way I am looking for BUT when DH says I will play with the children you can sew..... I RUN LIKE THE WIND! I grabbed a handful of my PUL and ALOVA and started sewing ASAP! I didn't want to waste any sewing time. Most of the time I don't like using patterns because I never have the time to read them and they never turn out the way I want. This pattern "FITS" my DD. I do think that they will work well. but I will give a try at making up my own pattern next time. My DD is 17 months old and about 19 pounds. We can slip the trainers on and off without snapping but they are very loose. They don't seem to be so loose that they leak (we even used one at night last night). I would feel better if I added another snap because of how thin my DD is. I think when I make up a pattern for my DD I would make one with a little wider (tiny bit) in the crotch. My diapers are not stretchy so stuffing them takes a little longer. I would make a under belly cut and make the tummy area not as wide. I would make shorter sides. SO what I think would be better for my DD would be to take the diaper pattern I already made and turn it into a side snap. I have plenty of diapers right now so I don't know when I will get around to giving this a try..... Maybe not until after the holidays. I need to try to get my DD down for a nap so I can give a try at making a simple Pilgrim and Indian costumes for my children..... If I get them done today I will post them.
OH! first a close up picture front and back of the trainers! (Don't look to close at the stitching I am still just a beginner with sewing).

Monday, November 20, 2006

Poor and happy?

My DH and I have looked over our spending and we agree that we should live debt free. We are using Oprah's debt diet as a guide. WOW! It is hard!!! I thought this would be easy for us. We quit using credit cards a long time ago. We have no credit card debt right now. We don't have a mortgage and we don't live with lots of extras (Oprah's site calls it the latte factor). We don't get coffee on the go. We don't buy bottled water or many sodas, we hardly ever eat out, we don't smoke, I am never near a vending machine, I don't chew gum, we only use candy for rewards for difficult math or spelling drills for our son. We don't get the paper, and I only get 1 magazine that I will cancel when my 2 years is up. We do have a cell phone and we will cancel that when the contract runs out. Anyway I thought we were doing so GREAT! UNTIL!!!!! We got to the spot that said Other Living Expenses 25% of income. That is all food, clothing, entertainment, Travel, Childcare, medical expenses, Tithing, charity and other. I thought we would do so well looking this over. After all we don't do much traveling, we have very little expense with entertainment (we don't rent movies or even have our dish hooked up right now). I hope the Internet doesn't have to go only time will tell. Childcare is no cost to us. I am ALWAYS home with the children. We gave up most of our eating out a few months ago. I haven't spent much at all on clothing in the last year on any of us. BUT we still went over in this group!!!! They have a spot for tithing but when you give 10% before taxes that puts us at about 15% out of our check. Once that is done we have spent 15 of our 25% That gives us 10% to live on! We have been doing this for a few weeks now and I think we are still going over our 10% but we are getting closer. I doubt we will be able to get into the 10% number with Christmas so close but we are going to do what we can.... I think the other areas that we are not over in our spending like housing and credit card debt should keep us on track some but it would be nice to be in the right spots on that pie graph. KWIM?

Now to the reason I wrote all of that....... I am going to try and post one craft a week that cost me NOTHING! I will be using the supplies I have in my house already but I am going to try to not spend any money at all. I hope that I am creative enough to do this! I hope to make some Christmas gifts along the way. I am going to try and start a project tonight and with my DD cutting a tooth I don't know how far I will get but I will try to get one a week done. I think if I keep looking at this as a fun challenge it will feel better. If I am busy crafting I will not have time to want to shop and spend. Tune in later to see how this all turns out.........

Thursday, November 16, 2006

Lucky Girl

My friend Kcaarin gave my girl ALL this! You can't see from the picture how large the pile is. My little one will be warm and cozy for the winter. I have such Great friends!

Sunday, November 05, 2006

Look at the wonderful gift I got!

I didn't make this! Vicky Forba gave this to me! What a COOL GIFT!!! It reminds me of Harry monster from SS. We turned up the heat in the house so we could watch my DD run around in it! I have NEVER seen a diaper like this. I should tell you all that not only is it neat looking it is VERY SOFT! AND she sews BEAUTIFULLY! I dream of learning to sew that well! I don't think I can get that good at sewing.
SEE! Isn't it the coolest?