
I finished writing up the directions. I'm sorry I only have the pattern in one size right now. I will post other sizes soon as I get some free time (this week is full of craziness at my house). This pattern should fit a child 8-13 years old or a man with a smallish head (I don't think it will fit on a big head). It should fit a 21-22 inch head just right (using 1/4 seam allowance). My 4 year old daughter has an 18 inch head and it is loose on her.
To make a hat like this you will need
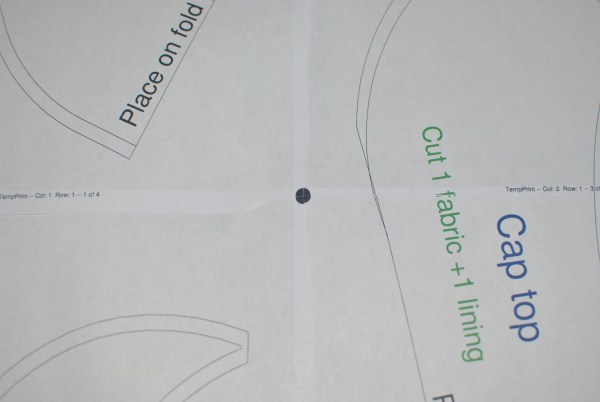
The pattern
A small amount of fabric for hat (thin fabric will need iron-on interfacing).
A small amount of fabric for the lining (you can use the same fabric you cut for the outside of the hat).
A small amount of very stiff interfacing (you can use plastic food trays, plastic file folders, or a in this case a cereal box will work).
Other than that you will need the pattern, scissors a sewing machine, needle and some thread.
This sample I've made from an old suit. The lining was cut from the same suit. A cereal box was used for the brim interfacing. It cost me $0 to make.
Print out the pattern and tape together lining up the registration marks.
I like to use masking tape or painting tape because you can reposition without tearing the paper.

Cut out pattern and you should have something that looks like this (my lining looks wrinkled because it isn't new fabric it's out of an old suit).

You can buy real interfacing for a hat. It is often called buckram. Joann fabric sells it here. I have bought it at Walmart a few times they don't always have it but when they do it's cheap (but I don't think they call it buckram). It looks like regular interfacing but it is rougher, very thick, and stiff (just like a ball cap). I don't know if you can see how thick it is from this photo. Seeing it so bent makes me regret the way I've stored it but it still works fine.

If this is your first try at making a cap or if you're making it for a costume you can skip the trip to the fabric store and use plastic from a food tray (like the large plastic fruit/cookies trays and lids), plastic file folders, or even a cereal box. You can double or triple the layers to make it as stiff as you like. I have some cardboard brims that held up for years and I've had some made from buckram only last a few weeks (depends on how destructive the child you give it to is). To keep this a free project I'm using my empty box of Post cereal for the brim.

Here is my stiff interfacing layer.


And a pin at the center on the side piece.


This part isn't really tricky but it's hard for me to explain. Look at the two purple pins below.


Then go wake your boy up to snap a picture so you can call this project finished. You might not want to do that but I felt to finish this tutorial up I had no choice (He's such a good sport bed head and all).

Then make one out of a beige fabric.


Make one out of a pair of jeans. This shows how this hat pattern will fit on a 4 year old.

Here is a cap made from cotton fabric with stripes.

Make sure you line up your stripes when cutting the pattern. Please ignore the very wet hair on my son (he was getting ready for school).

I hope you have as much fun making Driving caps or Golfing caps as I did.

My favorite. is the leather one with the cool looking worn/dark marks on the top (hat on the left in above photo). My son loved the beige hat at first (he picked out that fabric) but after a few days he decided the denim cap was his favorite. That is until tonight when I gave him the one made from a suit (that's now his new favorite).
Only the cap in the tutorial was made using a cereal box but I think they will all hold up about the same amount of time (this wasn't my first time using cereal box for brim interfacing).
When working with leather I use a walking foot, a leather needle, a stitch length of 3.5, and a bit of plumbers Teflon tape on my sewing machine.
disclaimer this pattern was drawn in the PatternMaster Pattern Editor and posted with permission from Wild Ginger Software, Inc.
If you have any questions feel free to write me. I usually try to take my time to write tutorials but this week is such a mess I feel like I have to rush this and hope for the best.
I'm linking up at...


216 comments:
«Oldest ‹Older 201 – 216 of 216Nice Blog, We are Manufacturer, Supplier and Exporter Of Mask Making Machine In Gujarat, India
CTBI Mortgage loan invite you to partner with us and benefit in our new Loan and Project funding program. We offer flexible and funding for various projects by the usual rigorous procedures.This Funding program allows a client to enjoy low interest pay back for as low as 3 - 4% per annul for a period of 2-30 years. We can approve a loan/funding for up to US D 500,000,000.00 or more depending on the nature of business. We are currently funding for: * Starting up a Franchise *Business Acquisition * Business Expansion *Commercial Real Estate purchase * Contract Execution * Personal loan We are open to have a good business relationship with you. If you think you have a solid background and idea of making good profit in any venture, do not hesitate to contact us for possible business co-operation via: Mateo1223@protonmail.com
जैसे प्यार से सभी चीज़ें आसान लगती हैं, उसी तरह उम्मीद से सब कुछ संभव लगने लगता है happiness quotes - hindi mei
2 lines HD love status in Hindi
دهان بجدة
أعمال الدهان في تحديث مستمر وألوان الدهانات تختلف بشكل دائم وتصبح أحدث من ذي قبل لذلك نوفر لكم دهان بجدة وهو واحد من أفضل المحترفين في مجال الدهان والقادرين على التعامل مع كافة أنواع الجدران والأسطح المراد تجهيزها وتوفير النتائج التي يبحث عنها العميل كما يمكن اختيار تصميم معين يتم تنفيذه على الجدران ليتكامل شكل الديكور المطلوب بنجاح ويتم كل هذا في أسرع وقت ممكن ومن خلال إمكانيات حديثة.
Really enjoyed reading your blog. This blog very helpful
discoverycentre
So nice and excellent blog you have shared. Liked and appreciated this well shared. Image Retouching
Clipping Path
Neck Joint
Background Remove Service
Drop Shadow Helps
Photo Cut Out
Image Editing
Image Manipulation
eCommerce Photo Editing
Clipping Path Tutorial
This article got my mind. Thank you so much for this wonderful article. It helped me a lot.
Best Regards,
Clipping Path
Dear Amber! I can't download the pattern. It say's I need access that file. Can You send me the pattern by email? Thank You for it in advance! majormail72@gmail.com
These blogs look really detailed. Clipping Path is a complex task that not everyone can do perfectly. You can contact us on Clipping Path Service Provider Company
This was a very well constructed tutorial. Tutorials like these help us learn new things and more.
Clipping Path Company
Good tutorial. Nice post. Great job!
Great Blog. I like it.
totally amazing, I can’t believe I’ve never tried to do that! Thank you so much for sharing this.
clipping path company
Good!
Goood!
Cool
Post a Comment